Assigning Students to Classes
Adding Students to Classes (Step-by-Step)
1. Navigate to https://test.arktest.org/admin There are three ways to add students to classes. You can add them individually or as a group from the students page, individually by going into a specific class, or in a bulk upload using the data import sheet.

2. To add students as a group or individually from the student roster, first click the Students tab on the left hand side of the screen.

3. Next, click the filter button <- THIS STEP IS OFTEN MISSED YOU MUST FILTER TO ONE GRADE LEVEL
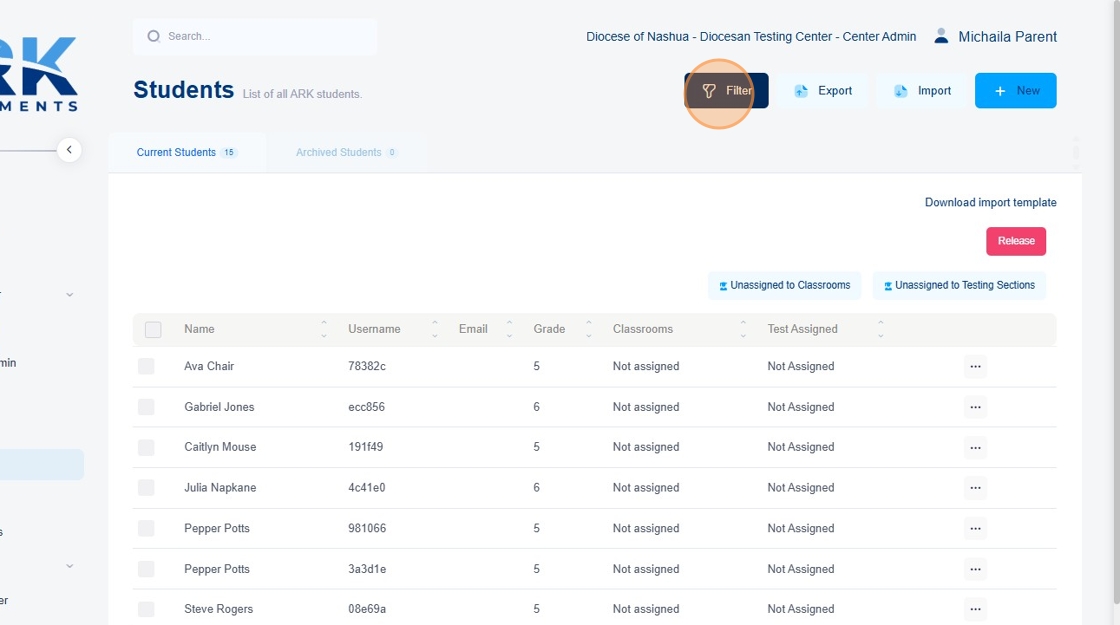
4. Select a specific grade level from the drop down menu

5. Click "Apply Filters"

6. Once you've filtered your students by grade level, you can either add one individual student to a class or multiple students at a time by clicking the check boxes on the left side of the student name.
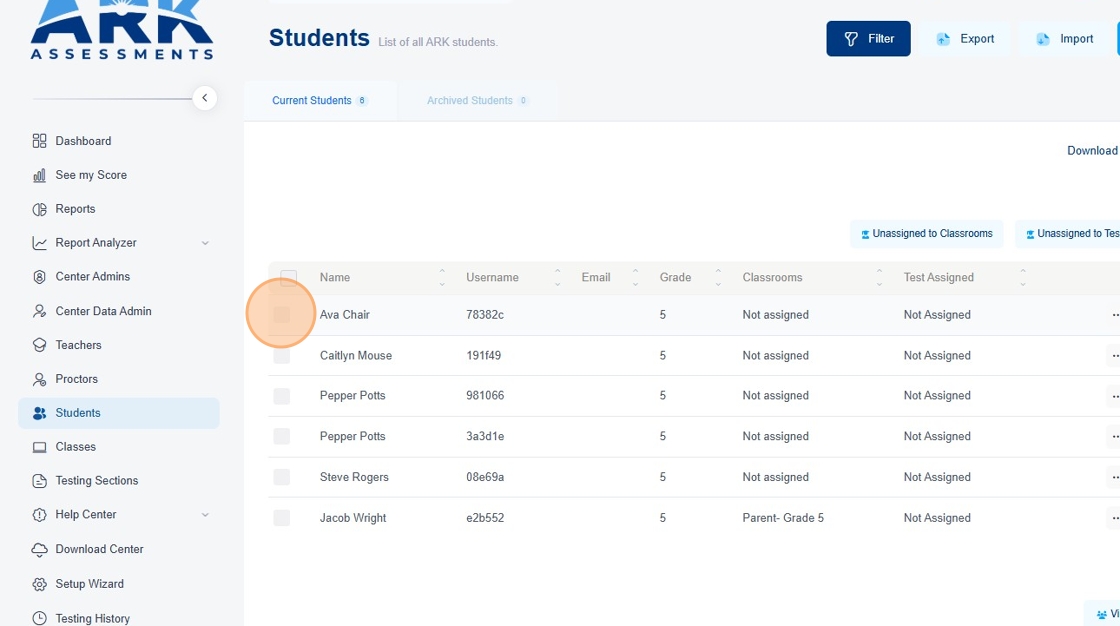
7. You can select one individual student by clicking the box next to their name

8. Multiple students by selecting multiple boxes

9. Or all of the students by clicking the check box at the top of the column

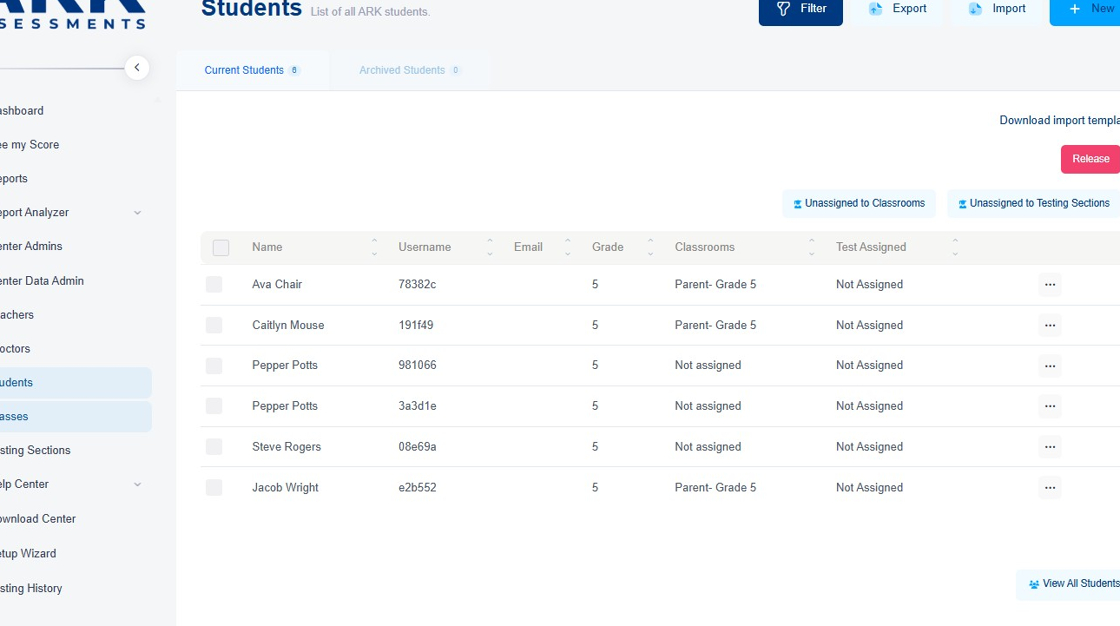
10. Once you have selected the students you wish to add to a class, click the 'Select Class' button on the right hand side of the screen. Select your class from the drop down menu.

11. Click the "+Add to class" button

12. Your selected students will now have been added to your class.
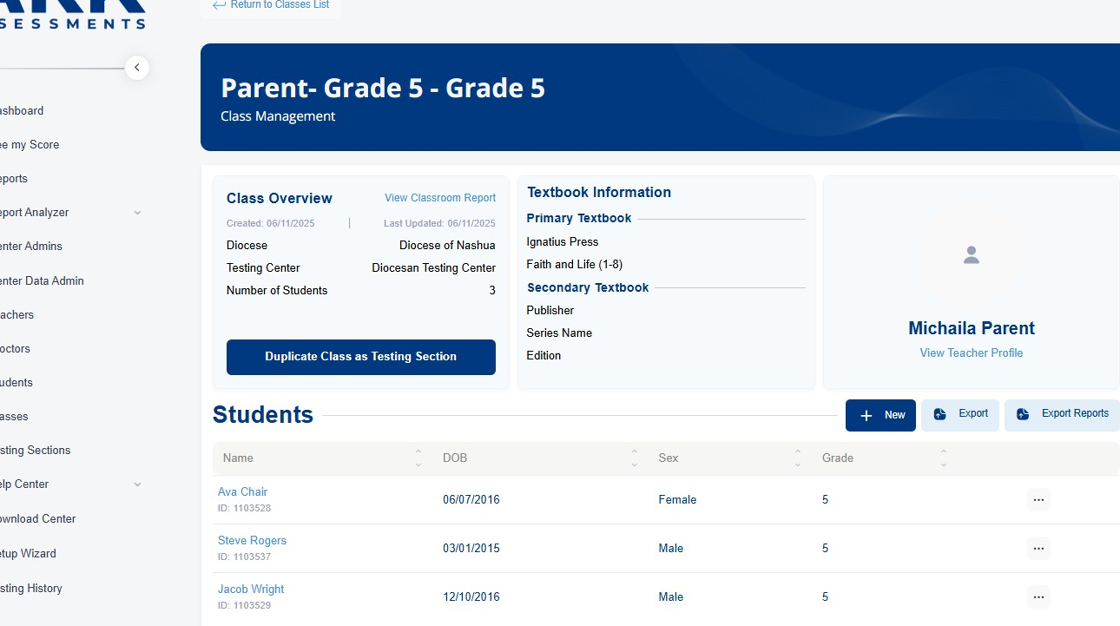
13. To add students individually from a specific class, click on the Classes tab on the left.

14. Next, find the class that you wish to add students to and click the three horizontal dots on the right hand side of the row
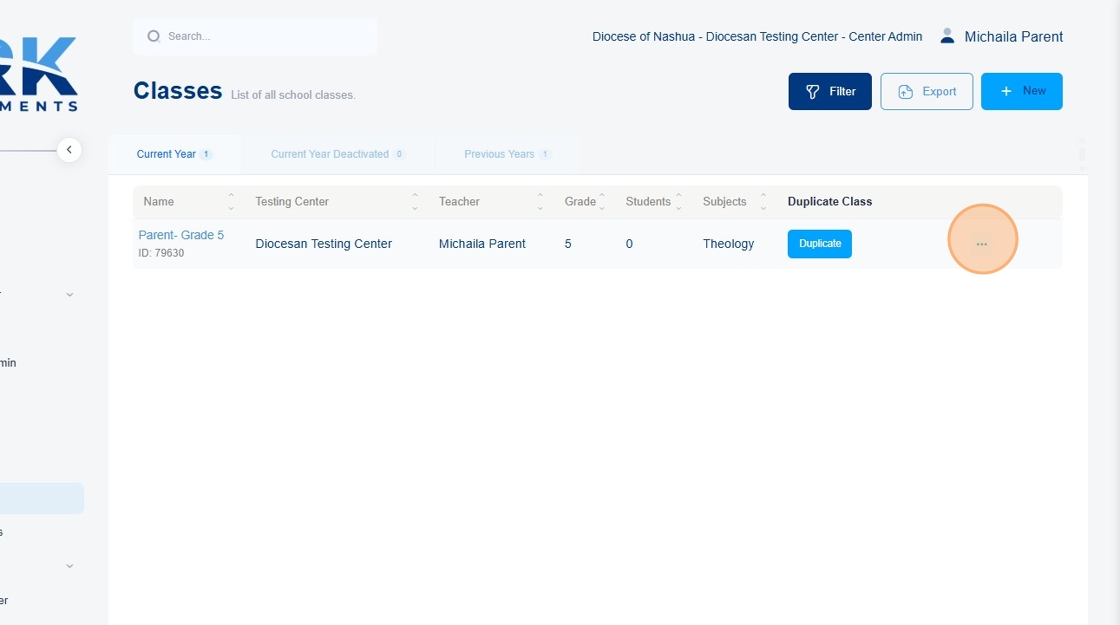
15. Click the View button.

16. From inside the class view, click the "+New" button.

17. Click the drop down menu that says user
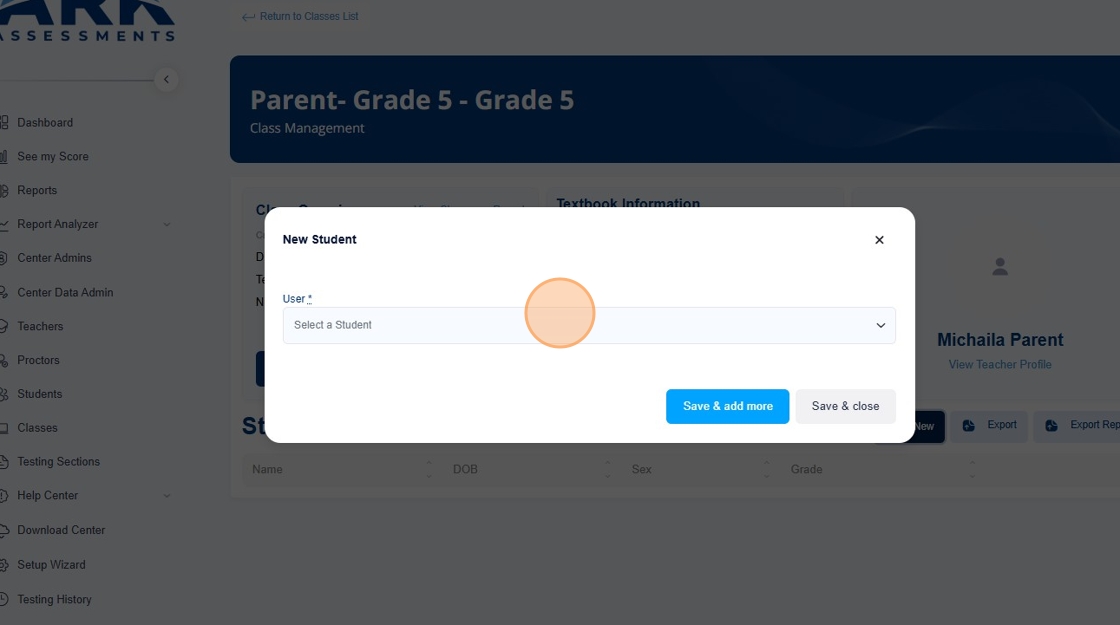
18. Select the student you wish to add

19. Click save and add more to add more students.

20. Continue this process until all of your students have been properly added

21. When you're finished, press, save and close.

22. To add students to a class in a bulk upload, use the ARK class ID function in conjunction with the Import Students template.

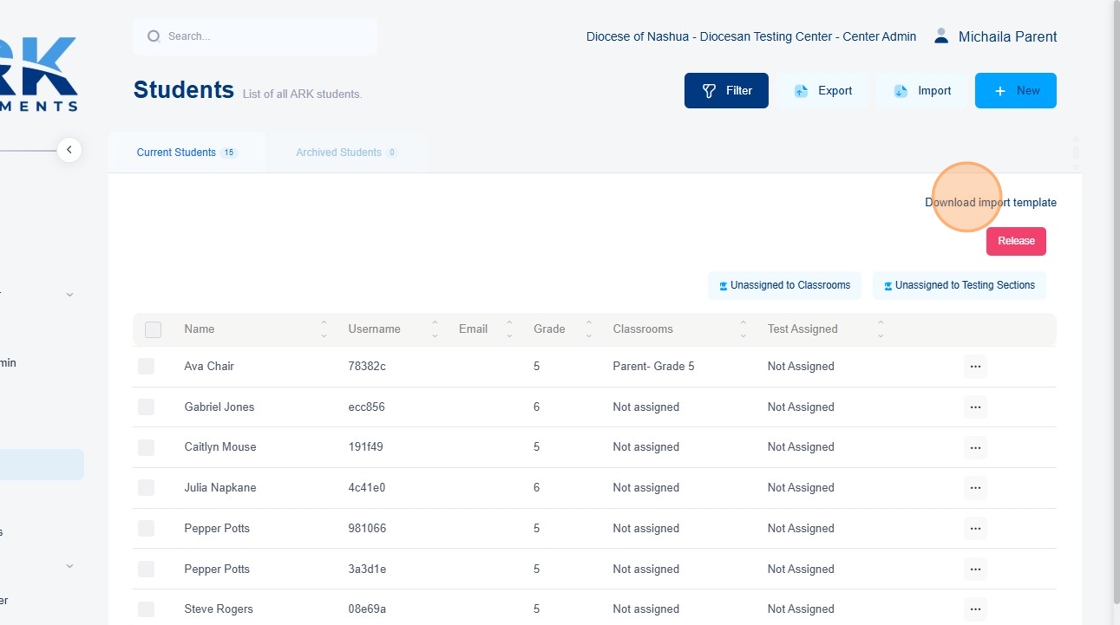
23. Note the ARK class ID found below the name of the class. It should be a five to six- digit number.

24. Next, click the students tab.

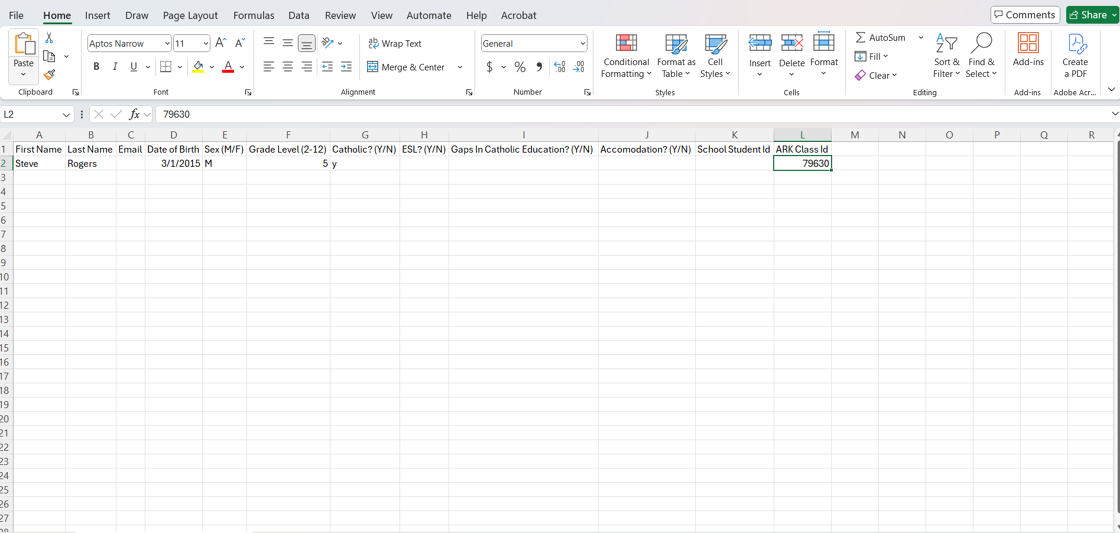
25. If you have not already, download the import template.
26. Fill out the import template with the required information. This includes first name, last name, date of birth, sex, grade level, Catholic, and School Student ID. Additionally, add the ARK class ID to the farthest column on the right for each student you wish to add into that class. Save your file as a .CSV file.
Note: For returning users OR if you have already uploaded your students using the import template, you can simply re-upload the students after putting in the ARK class ID in the same template you used previously. The program will recognize the students and place them into the proper classes.
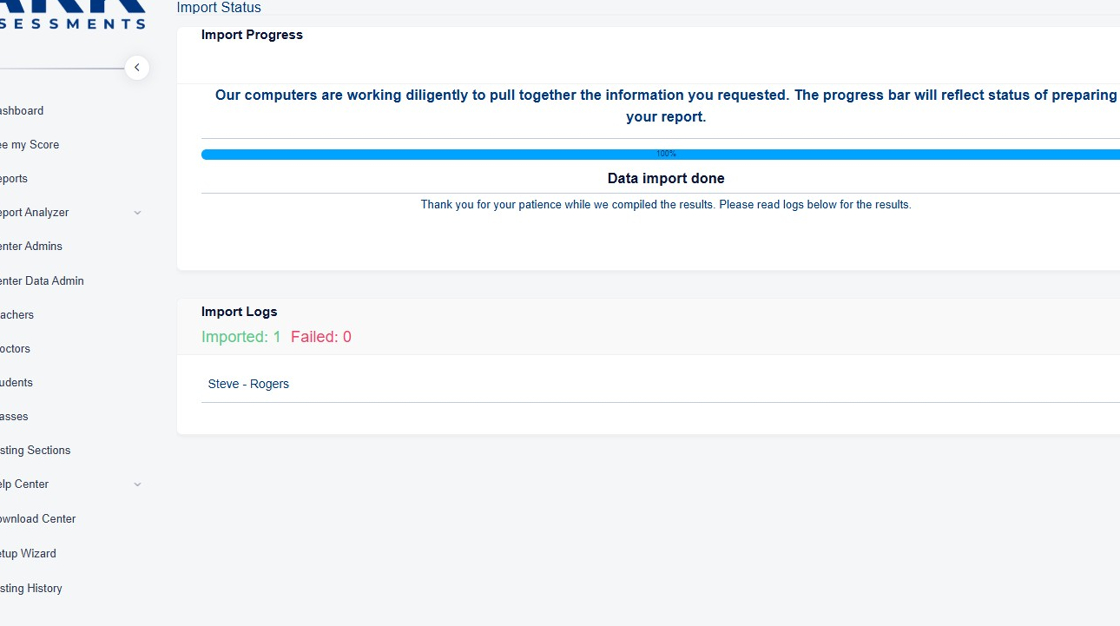
27. Once your file is completed, click the import button.
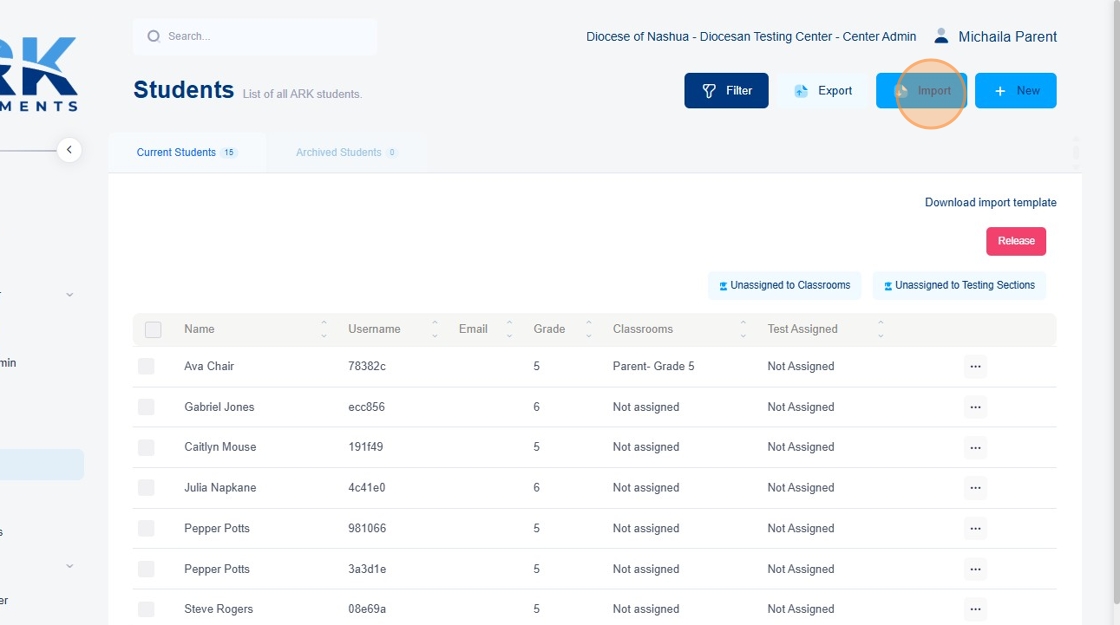
28. Select your file.

29. Ensure all the field pickers match the column headers.

30. When you're sure that all of the field pickers match the column headers. Click the import button.

31. The program will now add your students to the roster (if they have not been already added) and additionally place them into the proper classes. When the progress reads "Data import done" you can check to see that your students have been added to your classroom(s).
32. To do this, click back to the Classes tab.

33. Click the three horizontal dots to the right hand side of the screen

34. And click view.

35. Your students should now be listed underneath the student section in the classroom.
Made with Scribe
Related Articles
Rostering Students
Please ensure you have your Student Data available as described in 'Preparing your Data'. Adding Students to a Roster (Step-by-Step) 1. Navigate to https://test.arktest.org and login. This will bring you to the dashboard page. 2. Click on the ...Classes and Testing Sections FAQ
Note: This list of questions is not exhaustive. If your question is NOT answered by the following list, it is possible that the answer can be found in MORE detail in a different help article. The purpose of the following FAQ is to help guide you to ...Adding Students to Testing Section
To Add Students to a Testing Section: There are Three ways to assign students to Testing Sections once your students are loaded into ARK: 1. Duplicate Classes as Testing Sections (Easiest and Quickest!) - Ensure all Students are added to their ...Creating New Classes
&amp;lt;br&amp;gt; Creating New Classes (Step-by-Step) 1. Navigate to https://test.arktest.org/users/sign_in 2. Sign in using your username and password 3. The first time you login, you will be prompted to review your classes from last year, ...Parish Rostering: Shared Grades
If your testing center has mixed grades in the same classroom and you are teaching ALL students in that class the same grade-level material there is a workaround to allow testing. Determine what grade-level material you are teaching Before Rostering ...